Как выполнить восстановление компьютера Vaio с помощью VAIO Recovery Center» [Центр восстановления VAIO]»
Применимые продукты и категории для данной статьи
С помощью этой статьи можно восстановить системный раздел компьютера VAIO в заводское состояние. Она применима ко всем компьютерам VAIO с предустановленной операционной системой Windows Vista, если раздел восстановления не был удален.
Важное замечание! Во время восстановления будут удалены все данные на диске C.
Применяйте это решение только в случае наличия резервной или дублирующей копии ваших личных данных.
- Существует два метода доступа к центру восстановления VAIO.
- Из Windows Vista.
- Нажмите Пуск.
- Выберите Все программы.
- Нажмите VAIO Recovery Center [Центр восстановления VAIO].
- Без Windows Vista.
- Загрузите или перезагрузите VAIO.
- Увидев логотип VAIO при загрузке, несколько раз нажмите клавишу F10 (см. рис. 1).
- Из Windows Vista.
Рис. 1. Логотип VAIO при загрузке
Нажмите клавишу Enter [Ввод], когда появится экран «Edit Boot Options» [Изменение параметров загрузки] (см. рис. 2).
Рис. 2. Экран «Edit Boot Options» [Изменение параметров загрузки]
Выберите Restore C: Drive [Восстановление диска C:] и нажмите кнопку Пуск (см. рис. 3).
Рис. 3. Восстановление диска C
How to recover your VAIO with VAIO Recovery Center
Applicable Products and Categories of This Article
This article enables you to restore the system partition of a VAIO to factory state. It is applicable to VAIO computers preinstalled with Windows Vista, unless the recovery partition has been removed.
Note: Additional information on the recovery system can be found in the Troubleshooting and Recovery Guide delivered with your VAIO computer. This guide is also available on this website for each model.
Important Notice:
- All data on the C: drive will be deleted in this process. Please follow this solution only if your personal data is backed up or redundant.
Proceed as follows to recover your VAIO computer to factory state:
- You can access VAIO Recovery Center in two ways:
- Within Windows:
- Close all open programs.
- Click the Start button and then click All Programs .
- In the All Programs menu, click VAIO Recovery Center .
- If Windows does not start:
- Start or Restart your VAIO.
- Press the F10 key several times while the VAIO logo is displayed (see figure 1).
- Within Windows:
Figure 1 — VAIO logo displayed while booting
Press the Enter key when the Edit Boot Options screen appears (see figure 2).
Figure 2 — Edit Boot Options screen
Figure 3 — Restore C: Drive
Click Start and confirm with Yes when prompted (see figure 4).
Figure 4 — Recovery start
Ошибка 333. Странности центра восстановления ноутбуков Sony VAIO
Так уж получилось, что за последнюю неделю столкнулся сразу с двумя странными и неприятными случаями с известными брендами. Одним из них, с сервером HP я поделился вчера, наверное стоило выделить ту тему в отдельный пост или объединить с сегодняшним, что было бы несколько логичнее.
Ладно, перейдем к сути проблемы. Неприятный сюрприз ждал меня при замене жесткого диска на ноутбуке Sony VAIO VPCCW1E1R. С маркировкой своих изделий Sony явно перемудрили, причём модификаций одной и той же модели больше чем у дурака фантиков, но проблема не в этом. Как я уже упомянул выше, понадобилось заменить жесткий диск, который приказал долго жить, как-никак ноутбуку уже 3 года. Раздел восстановления с полудохлого винта удалось благополучно спасти, он был в идеальном состоянии. Планировалось восстановить систему к заводским настройкам в первозданном виде, сохранив лицензию.
Жесткий диск был приобретен аналогичный, того же объема и производителя — WD на 320Gb, единственное отличие маркировка и серия конечно другие. Recovery-раздел был успешно перенесен на новый диск и по F8 ноутбук с радостью подгрузил мне с него Центр восстановления VAIO.
А вот дальше этого дело не пошло — процесс восстановления системы обрывался на 2% на форматировании диска с очень «информативным» сообщении некой ошибке 333. Излазив ВСЮ выдачу Google по данной проблеме (реально просмотрел все упоминания о ошибке 333), ответа на вопрос как с этим бороться и откуда у данной проблемы ноги растут, найти и не удалось. Техподдержка Sony ограничивается отсылкой в сервисный центр, а ведь такая проблема имеет место быть и не только на данной модели ноутбука.
Насколько я понял, в установщике, который находится в recovery разделе диска, где-то прописано строго определенное оборудование, серии устройств на которые возможна установка данной копии Windows. Это лишь моя догадка, исходя из того что я увидел покопавшись в содержимом раздела.
При установке Windows 7 x64 возникает ошибка «не найден необходимый драйвер для дисковода оптических дисков»
Пришлось распрощаться с лицензией. Следующая странность вылезла при попытке установить аналогичную, но OEM версию Windows 7 x64. «Не найден необходимый драйвер для дисковода оптических дисков». Замечу, что система ставилась с флешки.
Ладно, думаю, может дистрибутив какой «косячный» попался, решил проверить установкой пиратской 100% рабочей версии Windows 7 x64. Попытка закончилась аналогичной ошибкой.
Полазил по форумам, где радостно и дружно рапортуют о решении проблемы, предлагается делать установку переткнув флешку в другой USB-порт, так как Windows 7 не поддерживает установку с USB 3.0. В этом случае и выдается сообщение — «не найден необходимый драйвер для дисковода оптических дисков».
Опять не мой вариант. в Sony VAIO VPCCW1E1R нет USB 3.0 в принципе, так что дело не только в USB 3.0. В конечном счете пришлось устанавливать 32-битную версию Windows 7, с ней все прошло гладко.
Вот такой опыт с восстановлением ноутбука SONY. Так что стоит лишний раз задуматься о приобретении ноутбуков этого бренда.
Если считаете статью полезной,
не ленитесь ставить лайки и делиться с друзьями.
Как восстановить Windows 7 из раздела восстановления ноутбука Sony VAIO?
…Намедни попросили меня починить ноутбук Sony VAIO, – хозяева жаловались на то, что он «тупит и виснет»…
Выяснилось, что до меня ноут побывал в очумелых ручках эникейщика, который – провозившись 3 месяца! – зачем-то снёс лицензионную Windows 7 и установил пиратскую.
Но дело даже не в том, что он установил пиратскую «Винду», а в том, что сделал он это весьма и весьма коряво, умудрившись уронить индекс производительности брендового ноутбука (2-ядерный процессор, 4ГБ ОЗУ) до 1,0.
А в том, что ноут стал работать неустойчиво и непроизводительно, эникейщик винил не свои руки и мозги, а «неразрешимые конфликты устройств»…
Хвала всевышнему, что эникейщик не догадался (не смог. ) удалить «секретный» раздел – раздел восстановления, позволяющий вернуть «девственность» ноутбуку (первоначальное состояние с настройками завода-изготовителя).
Ноутбуки Sony VAIO, как правило, оснащены «волшебной» кнопкой ASSIST:

Как восстановить Windows 7 из раздела восстановления ноутбука Sony VAIO:
– предварительно сохраните ваши данные на другой носитель;
– нажмите кнопку ASSIST;
– последовательно будут появляться сообщения Загрузка файлов…, Запуск Windows, Подождите, запускается VAIO Care – Восстановление;
– в окне VAIO Care – Восстановление нажмите Запустить Мастер восстановления (для выполнения настраиваемого восстановления выберите Сервис, затем нажмите Запустить Мастер расширенного восстановления);
– в окне Хотите спасти данные? нажмите Пропустить спасение (если вы не сохранили предварительно данные на другой носитель, нажмите Да, начать спасение прямо сейчас);
– в окне с сообщением «Вы уверены, что хотите начать восстановление?» установите флажок Да, я уверен;
– нажмите Запустить восстановление;
– дождитесь окончания процесса восстановления.
Восстановление проходит в автоматическом режиме, ваше участие потребуется только в конце процесса: выбрать локализацию операционной системы, установить время и часовой пояс, ввести имя учётной записи.
Как восстановить Windows 7 на Sony VAIO, не оснащённых кнопкой ASSIST:
– включите ноутбук и несколько раз нажмите клавишу F10 (до исчезновения логотипа VAIO);
– при появлении окна Изменение параметров загрузки нажмите клавишу Enter;
– выберите Запустить Мастер восстановления (для выполнения настраиваемого восстановления выберите Сервис, затем нажмите Запустить Мастер расширенного восстановления);
– следуйте инструкциям на экране.
1. В процессе восстановления ноутбук несколько раз перезагрузится.
2. Средняя продолжительность процесса восстановления – около 3-х часов.
3. Обязательно дождитесь окончания процесса восстановления (иначе придётся начинать всё сначала. ).
4. Иногда во время восстановления кажется, что ноутбук завис, но это не так. Вы можете убедиться в том, что ноутбук не завис, по светодиоду жёсткого диска: если он мигает, то волноваться не о чем.
The best way to deal with Vaio Recovery Center Error error codes
Click here now to run a quick scan for Vaio Recovery Center Error & corresponding errors.
Vaio Recovery Center Error error message codes are often produced because of missing files inside of your MS Windows operating-system.
To Fix (Vaio Recovery Center Error) error you should follow the steps below:
*File size: 1MB
Download time:
A Vaio Recovery Center Error error is the Hexadecimal data format of the error generated. It’s the common error code format utilized by Windows along with other Windows compatible software applications and device driver suppliers.
This computer code is required by the manufacturer to ascertain the error code made. This unique Vaio Recovery Center Error error message gives you a numeric number and also a technical explanation. Often the error code might have more parameters in Vaio Recovery Center Error data format .This additional numerical code will be the location of the system locations in which the directions are stored at the time of the error.
A Vaio Recovery Center Error error code can be because of Microsoft Windows system data file failure. Corrupted system files can be a serious danger to the health and wellbeing of a computer.
There are many situations which can have resulted in system file errors. An unfinished installation, an unfinished file erasure, incorrect deletion of utilities or components. It may also be caused when a system is infected by a trojan or adware/spyware infection or by an improper shut down of the computer system. The above actions can end up in the erasure or data corruption of Windows system files. That corrupted system file will lead to absent or erroneously linked information and archives required for the correct operation of the program.
Proven methods to quickly address Vaio Recovery Center Error error code?
The 2 main options to repair Vaio Recovery Center Error error message:
Expert Resolution (advanced):
1) Start the computer system then log on as the admin.
2) Then click the Get started button then click on Programs, Accessories, System, then select System Restore.
3) In the next window, select “Restore my computer to an earlier time” and then press Next.
4) Pick the freshest restore date within the “select a restoration date” listing, then click on Next.
5) Then click the Next button within the verification window.
6) Reboot your computer or laptop after the restoration is done.
Novice User Resolution (completely automated):
2) Install program and simply click on Scan button in the software.
3) Simply click on the Repair Errors button whenever the diagnostic scan is successfully completed.
Having a PC problem is not very nice. While user experience is very important for PC/Laptops/Netbooks customers, Sony came with a couple of tools that come in handy when a system/os problem occurs. This tools are usually used to diagnose system errors, backup and recover data, to recover Sony preinstalled software and drivers or to recover the entire VAIO to its original settings. Usual, this tools are found under a software called “VAIO Recovery Center” for older VAIO models and “VAIO Care” for newer.
But … what can be done when your VAIO can not load Windows?
A second option to recover your VAIO is using the build in recovery tools. To access the recovery tools from a SONY VAIO, the default key is F10. Immediately after you turn on your VAIO press F10 key. You may need to press it a couple of time while you see the first VAIO logo after you start your computer. This will ask you to boot from a different sector than normal one used to boot into your Windows or will enter directly to your recovery tools.
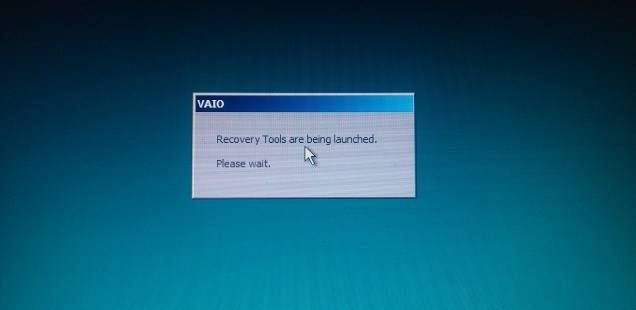
After a small waiting period, the VAIO Recovery Center will be launched.
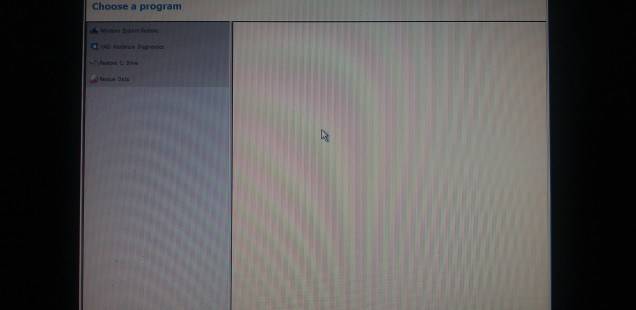
1. Windows System Restore
System restore will restore your program files to a predefined restore point. Restore points are points in time, which may be changed by the user in System Properties. Under normal conditions, this program should not affect your personal files.
2. VAIO Hardware Diagnostics
The VAIO Hardware Diagnostics is a utility program that helps you to determine if your VAIO’s problem is related to your hardware or not. Computer problems can be caused by a number of factors including the hardware itself. Software installed on your VAIO or its settings could be the cause as well.
3. Restore C: drive
Restore the C: drive to its original factory condition. This includes all factory installed software. The time to complete the restore can take un to an hour depending on the amount of software being restored and the speed of your computer. This program deletes all files on the C: drive.
4. Rescue Data
Rescue Data detects the data which can be saved on the internal disk drive when Windows does not start, and saves this data to an external hard disk drive or removable media.
In case you need to use any of this options, take your time and read all the instructions you find. Be aware of the options that can harm your personal data. Consider the possibility of a backup before any recovery operation.
by Sean Doyle · Published March 17, 2012 · Updated March 21, 2017
To save PDF right click the link below, for Google Chrome “Save link as…”, for Internet Explorer “Save Target As…”.
Documentation PDF: Sony Vaio Recovery Guide
Sony Vaio computers are one of the easiest computers to back up, recover, or perform a factory restore on, simply because of their user friendly recovery center (Included on all factory Sony Vaio computers).
This article provides all necessary procedures to access the Sony Vaio Recovery Center in order to perform backups, restores, recoveries, and diagnose issues in any scenario to ensure the correct guidelines are followed.
- 1. Click Start on the Windows® taskbar, and click Control Panel.
The Control Panel window appears.
- 2. In the Control Panel window, click Performance and Maintenance.
If Performance and Maintenance is not listed in the Control Panel window, click Switch to Category View on
the left side of the window, and click Performance and Maintenance.
The Performance and Maintenance panel appears.
Using the VAIO Recovery Wizard may require you to restart your computer, even if you cancel and exit the
wizard.
- 3. Click VAIO Recovery Wizard.
The VAIO Recovery Wizard window appears.
- 4. In the Welcome window, click Next.
- 5. Follow the on-screen instructions.
- F 10 is the Sony Vaio recovery center Hot Key
Upon starting your computer you press the F10 key during the prompted system boot menu. This will take you straight into the Sony Vaio recovery center.
The recovery center in Sony Vaio computers (which comes factory installed) is a program (software) that makes backing up data, creating scheduled backups to all devices (even networks), wiping out data, restoring your Sony Vaio to factory settings and more a very user friendly experience.
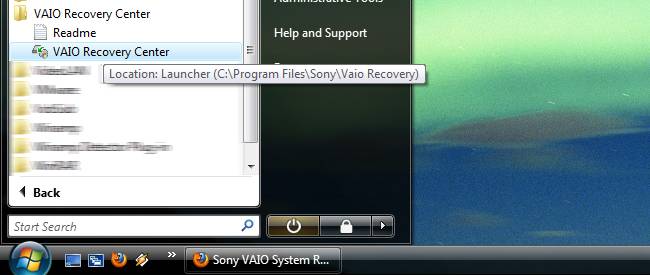
- You can sometimes find the Vaio recovery center in the Start menu>All Programs.
- It may also be found here: C:>Program Files>Sony>Vaio Recovery
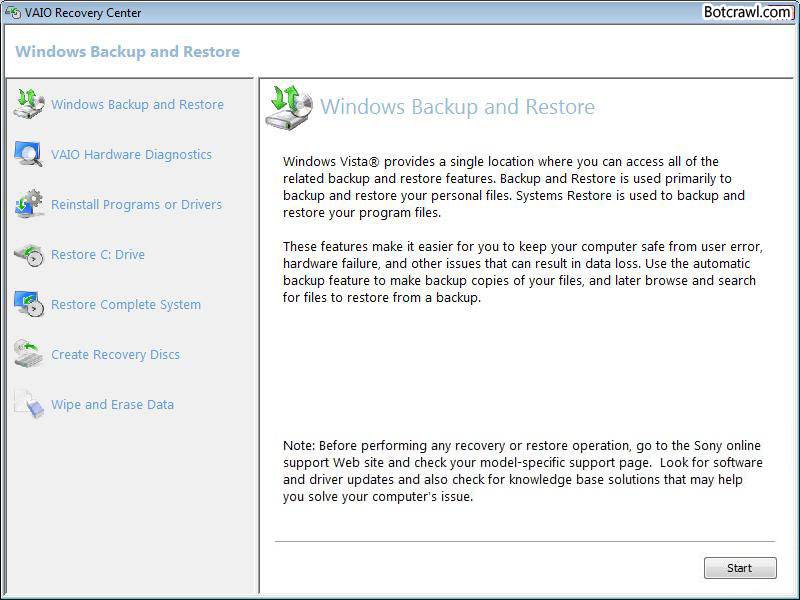
- A Backup is when you want to save, “backup” your files, computer, etc. to a disc, storage device, network, or your computer system itself.
- Performing a Recovery means you will recover your computer from an early backup location such as a disc or storage device you previously performed a backup onto.
- Restore Complete System means you will restore your computer to the point as if you just turned it on for the first time. You will lose all saved data, you will only have what was on your computer when it was brand new. Your operating system will remain fine.
- Scheduling Backups automatically is a great way to always be sure your files, information, and computer data may become retrievable in moments where you need it such as an infection or virus.
- Restore C: Drive is used to, well, restore the C Drive of your Sony Vaio. It is commonly used to recover photos, documents, and data.
- Wipe and Erase Data allows you to delete specific data, say you were to sell your Sony Vaio, such as an entire drive like C:.
- 1. Click Start on the Windows® taskbar, and click Control Panel.
The Control Panel window appears.
- 2. In the Control Panel window, click Performance and Maintenance.
If Performance and Maintenance is not listed in the Control Panel window, click Switch to Category View on
the left side of the window, and click Performance and Maintenance.
The Performance and Maintenance panel appears.
Using the VAIO Recovery Wizard may require you to restart your computer, even if you cancel and exit the
wizard.
- 3. Click VAIO Recovery Wizard.
The VAIO Recovery Wizard window appears.
- 4. In the Welcome window, click Next.
- 5. Select Proceed with System Recovery, and click Next.
- 6. Select Windows System Restore, and click Next.
- 7. Follow the on-screen instructions.
Recovery or Restore: Due to computer infections, viruses, adware, broken hardware, etc.
It is important to know what is wrong with your Sony Vaio to understand what steps you will need to take. Computer infections, viruses, broken hardware, and other problems require a more tactical approach when accessing the Sony Vaio recovery center.
Computer Virus Symptoms:
- Your operating system may still work but will not allow you to access files or folders.
- Your computer turns on but the screen goes black or turns a different color.
- Your computer turns on but freezes immediately or at any given time limit.
- Internet browsing shows too many pop up windows, advertisements, or re-directs. (re-directs can go unnoticed and can happen using websites like Google)
If you suspect a virus or infections and can not easily access your Vaio recovery center read the steps and options further below.
 Signs of broken hardware or computer part:
- Computer turns on but only shows a black screen and you may not enter any menus or screens.
- The operating system logo (Microsoft windows logo) is the only thing you on your computer screen.
- Computer shuts off whenever it wants to.
If your hard drive is malfunctioning or broken you may not be able to access your files until you fix the part or use the drive connected to another compatible computer. In cases of a significant solid state drive you may not have much luck recovering data depending on the year and model of your Sony vaio.
Using the factory pre installed software boot disc:
The boot disc is not always necessary. In matters of new a new solid state hard drive your boot disc may be used to reboot your system, perform recoveries, and factory restores or install missing drives, even the Vaio Recovery Center may be installed. Therefore without getting into a whole new category it’s not recommended to use your boot disc unless of significant hardware failure, no access to menus or your operating system, or some type of hardware and software replacement.
How to access the Sony Vaio recovery center with the boot/recovery disc:
- Turn your Sony Vaio computer ON.
- Open the disc drive, and place the Startup Recovery Disc into the optical drive – then close the disc drive.
- Turn your computer OFF.
- Wait a few seconds and turn your Vaio back ON.
- When prompted, insert Recovery Disc 1 into the optical drive, and click OK. (The VAIO Recovery Wizard will appear)
- Click Next.
- Select one of the available menu options.
Missing or lost boot disc/recovery disc for Sony Vaio:
If you can not find your disc or can not find the recovery center on your Sony Vaio computer for whatever reason you may contact Sony support for a new disc. There are no downloads.
You should never download a standalone recovery center unless it is part of a trusted virus protection company included in their software.
Click and drag files onto a disc, flash drive, external hard drive, and other storage devices:
There are different ways to backup files onto a hard drive, compact disc, flash drive, media card, etc. using Windows on a Sony Vaio.
- Enter a disc or connect your memory drive to your computer whatever you prefer to use which has enough space to store what you want.
- Then open the “my computer” window, which can be found in your start menu most of the time. You should see an icon suggesting a storage device is properly connected. ( Its not necessary but you may right click this storage device icon and open it in a new window .)
- Select the folders, pictures, documents, videos, programs, etc. which you want to save or back up from your computer using the folder icons to navigate (or select your entire drive folder such as C:) and drag it (by holding the left button on your mouse) into the storage device.
Storage device icons commonly look like this (below) in Windows Explorer or “My Computer”:
The number of recordable CDs or DVDs required to create a VAIO Recovery Media Kit varies, depending on computer model.
Your computer must be equipped with a recordable optical drive, such as a CD-RW, DVD-RW, or DVD±RW drive.
You can create a recovery media kit using:
- CD-R media
- Single layer DVD+R or DVD-R media
You cannot create a recovery media using:
- CD-RW media
- DVD+RW media
- DVD-RW media
- Double layer DVD+R or DVD-R medi
 My Sony VAIO laptop computer was severely attacked by virus and I was able to delete them using a powerful antiviral program. After which my Windows OS restarted. And I got a black screen, which said that some system files are missing. I somehow managed to boot into the system after two to three attempts. But I found that many of the files were missing from my Sony VAIO laptop and also its speed has been gradually decreased. What should I do now to overcome this problem and to get my files back?
To counter these kinds of situations, Sony VAIO laptops are preinstalled with VAIO recovery center, a tool which helps you to restore all the missing files and restore the hard drive. It is also equipped with a recovery partition utility, which contains the Windows set-up files with all default programs and drivers. To use this tool follow the below procedure:
- Open “All Programs” from the “Start” menu
- Open “VAIO Recovery Center” application from the program menu
- Click «Restore C: Drive» option from the VAIO Recovery Center interface
- Click on «Next» button
- Start the process by clicking on the “Start” button which restores the C: drive, Windows will be reinstalled and laptop configured back to its factory settings
However if your Sony VAIO laptop contains only one drive then restoring to factory settings results in complete removal of data from the laptop hard drive.
Let us see some of the common reasons for data loss on your Sony VAIO laptop
- Human Mistakes: Human mistakes such as accidental deletion of a file or folder is one of the main reasons for data loss from VAIO laptop
- Formatting: Formatting the laptop drive without taking the backup of important files
- Virus Attack: Virus infection on the laptop hard drive results in file system corruption which in turn leads to data loss from the laptop drive
- File system conversion: Converting a file system from one to another i.e. from FAT16 to FAT32 or from FAT32 to NTFS leads to complete data loss from Sony VAIO laptop hard drive
- Improper System Termination: Turning off your system improperly sometimes lead to data loss from Sony Vaio laptops, this could be due to battery issue or any other reason
So how to recover data after such situations?
Yodot Hard Drive Recovery is one of the widely used data recovery software to recover data from Sony VAIO laptop. The application has the ability to create “Disk Image” of the hard drive which bypasses the bad sectors, which can be used in the future if any kind of data loss mishap happens. Furthermore supports recovery of more than 300 different file types.
Working of the software
- Download and install Yodot Hard Drive Recovery tool to your Sony VAIO laptop
- Open the application and stick to the guidelines appearing on the screen
- The software displays two options from the main screen, “Partition Recovery” and “Formatted / Reformatted Recovery”
- Choose either of the two options based on your data loss scenario
- The tool scans and displays all the physical and logical drives from the laptop
- Select the drive from where data is to be rescued from and click “Next”
- The application shows a screen asking for the selection of file type to be recovered, you can make your selection or simply click “Skip” button to select all the file format by default
- Allow the scanning process to complete
- After the scanning process, the tool displays all the recoverable data from the laptop
- Select the files which you want to recover
- Preview the picture files and save the rescued files to your desired location
IObit Malware Fighter 6.2.0.4770
Published: 17 September, 2018 11:09
IObit Malware Fighter 6 is a powerful and comprehensive.
Dr.Web CureIt 11.1.201806181
Published: 17 September, 2018 09:11
Dr.Web CureIt is an indispensable tool for curing.
JoyoPlayer for Mac 1.0.0
Published: 17 September, 2018 08:48
JoyoPlayer for Mac is a simple yet powerful media player.
Comodo Dragon 67.0.3396.99
Published: 16 September, 2018 10:30
Enjoy a faster, more stable and safer internet with.
Free Flash to HTML5 Converter 2.7.0
Published: 16 September, 2018 10:20
Free Flash to HTML5 Converter is a professional Flash.
Stack Menu 1.0.1
Published: 16 September, 2018 10:12
Stack Menu stays in the macOS menu bar to provide quick.
Passkey Lite 9.3.1.8
Published: 15 September, 2018 08:58
Passkey Lite, a free version of Passkey, is a simple.
Pirate Desire 2.98
Published: 15 September, 2018 08:47
Transparency. Privacy protection. and Participation. our.
Photovoltaic System 3.52
Published: 15 September, 2018 08:40
Simulate the amortization of a Photovoltaic System over.
21st century Truck driver 3.52
Published: 13 September, 2018 12:51
The 21st century Truck driver sells his house, buys old.
RPM Remote Print Manager Elite 32 Bit 6.1.0.439 (tintin)
Takes care of any printing job to be converted and saved.
Nutrigenic Helper 1.0 (Simsiak)
As a dietician I use this software to plan a nutrient.
Radmin 3.5.2.1 (Jefferson)
Can control the computers from distance location even if.
JavaScript Diagram 3.2 (Xeviers)
Lots of flow diagrams can be drawn in short time with.
WarpPro 1.0 (Rownok)
Reproduces any record after fixing the timing error of.
HueScope Separator 1.0 (Kislu)
Separates the colors from an watercolor image which is.
ERD Concepts 8.0 (Tintin)
For backend database design it is the perfect one, manual.
MindView 7.0.11522 (Zerin)
Can easily note down any new ideas or plans for future.
Program Protector 4.4 (toma)
Sometimes you need to protect some programs from.
RSHUT PRO 2.8.1.2 (Zerin)
Shuts your computer or restarts on scheduled time, also.
FreeCommander 2009.02b (6120)
Released: 08 November, 2011
FreeCommander is an advanced file manager program. It can.
AbiWord 2.8.6 (1778)
Released: 05 December, 2011
AbiWord is a free word processor for all major operating.
TestDisk and PhotoRec 6.14 (2805)
Released: 24 October, 2012
TestDisk is a powerful free data recovery software!
NetBeans IDE 7.4 (1027)
Released: 02 December, 2013
Free and open source IDE for programmers in almost all.
Safari for Windows 5.1.7 (3940)
Released: 04 December, 2013
Experience the fastest web browsing in your windows PC.
GeekUninstaller 1.1.1.21 (1361)
Released: 08 December, 2013
GeekUninstaller is a free small sized uninstaller program.
SeaMonkey 2.23 (1556)
Released: 07 January, 2014
Advanced Internet user, web developer and corporate.
Ahnenblatt 2.74 (70)
Released: 15 November, 2012
Ahnenblatt is a free and easy-to-use genealogy software.
Sony Vaio Windows 7 Theme is dedicated to the Sony Vaio brand of computers from Sony. This is a high resolution Windows 7 Theme which will fit very well into nearly all desktop and laptop screens with Windows 7 operating system. There are 10 background images of 1920 x 1200 widescreen resolution in the theme.. Freeware download of Sony Vaio Windows 7 Theme 1, size 11.99 Mb.
Sony Photo Recovery(Windows & Mac) 2.0 Sony Photo Recovery
Sony is a popular brand of electronic gadgets. Its digital cameras are based on the latest technology and is capable of capturing high resolution pictures without any interruption. The picture clicked for the Sony camera get saved in the memory card installed in it. It is a very common situation that the picture stored in the memory card gets lost. Free download of Sony Photo Recovery(Windows & Mac) 2.0, size 4.00 Kb.
Sony Vaio PCG-Z505HE Windows 7 Driver Recovery CD 2 7 Driver Recovery CD
A Driver Recovery CD works with a windows cd to return your Sony Vaio PCG-Z505HE Windows 7 back to the original factory setup. Once windows has installed you put this cd into the drive as soon as windows gives you a found new hardware dialog box. Once inserted the Sony Vaio PCG-Z505HE Windows 7 will automatically find all the drivers and also. Free download of Sony Vaio PCG-Z505HE Windows 7 Driver Recovery CD 2 7, size 655.36 Mb.
Sony Vaio PCG-Z1M Windows 7 Driver Recovery CD 2 7 Driver Recovery CD
A Driver Recovery CD works with a windows cd to return your Sony Vaio PCG-Z1M Windows 7 back to the original factory setup. Once windows has installed you put this cd into the drive as soon as windows gives you a found new hardware dialog box. Once inserted the Sony Vaio PCG-Z1M Windows 7 will automatically find all the drivers and also install. Free download of Sony Vaio PCG-Z1M Windows 7 Driver Recovery CD 2 7, size 655.36 Mb.
Sony Vaio PCG-XR7Z Windows 7 Driver Recovery CD 2 7 Driver Recovery CD
A Driver Recovery CD works with a windows cd to return your Sony Vaio PCG-XR7Z Windows 7 back to the original factory setup. Once windows has installed you put this cd into the drive as soon as windows gives you a found new hardware dialog box. Once inserted the Sony Vaio PCG-XR7Z Windows 7 will automatically find all the drivers and also install. Free download of Sony Vaio PCG-XR7Z Windows 7 Driver Recovery CD 2 7, size 655.36 Mb.
Sony Vaio PCG-XR7F Windows 7 Driver Recovery CD 2 7 Driver Recovery CD
A Driver Recovery CD works with a windows cd to return your Sony Vaio PCG-XR7F Windows 7 back to the original factory setup. Once windows has installed you put this cd into the drive as soon as windows gives you a found new hardware dialog box. Once inserted the Sony Vaio PCG-XR7F Windows 7 will automatically find all the drivers and also install. Free download of Sony Vaio PCG-XR7F Windows 7 Driver Recovery CD 2 7, size 655.36 Mb.
This project aims to be a complement to configure the Sony Vaio Laptops from a user friendly graphical interface.
Currently only wwan switch available.
There are some GUI Tools for the sony-laptop linux kernel driver.
Sony Control Center 1.0 License — GNU General Public License (GPL). Freeware download of Sony Control Center 1.0, size 0 b.
VAIO Easy Connect is a useful application that was especially designed to provide Sony VAIO owners with a simple means of connecting their notebook to a network.
The program will only work with specific models of VAIO laptops so you should check the list of supported devices (available on this page) before installing the software.
Through this DVD player software you can play all regions DVD on all DVD drives (except the Matshita DVD-RAM serials, Sony VAIO serials and Toshiba Satellite serials) even if you have changed the region code 5 times.
Record DVD movies for your Apple. Free download of DVD X Player Std 5.5.3.7, size 20.88 Mb.
DVD X Player is the first region free/code free software DVD player in the world.
Through this DVD player software you can play all regions DVD on all DVD drives (except the Matshita DVD-RAM serials, Sony VAIO serials and Toshiba Satellite serials) even if you have changed the region code 5 times.
Record DVD movies for your Apple. Free download of DVD X Player Pro 5.5.3.7, size 20.88 Mb.
Recovery for Exchange Server 5.0.1017 Recoveronix Ltd.
Recovery for Exchange Server is a data recovery program for Microsoft Exchange Server databases. Recovery for Exchange Server processes corrupted mail databases (.edb, .stm) and saves the recovered data to a common Personal Storage File (.pst) format to be read with Outlook or other compatible mail client. Recovery for Exchange Server supports. Free download of Recovery for Exchange Server 5.0.1017, size 5.31 Mb.
Recovery for BizTalk is a powerful data recovery software for damaged Microsoft BizTalk database files (.MDF). Retrieves information from both corrupted databases and backups. Recovers channels, ports, envelopes; restores processed documents and shared queues. Saves recovered information in Transact-SQL script fit for quick database recreation. New. Free download of Recovery for BizTalk 1.1.0840, size 1.72 Mb.
Kryz.org site describing various details on the Sony Vaio PCG-C1MHP Picturebook, including Windows XP experiences and Debian Linux installation details
Describes burn treatment therapies including skin grafts and reconstructive surgery. Information on burn centers and resources for long-term treatment and care.
Education, resources and support in the process of recovery and the understanding of Anorexia, Bulimia or Compulsive Overeating as well as Muscle Dysmorphia.
A site giving all pertinent information about the formation, operation, philosophies and testimonies concerning the success of our six month, resident, Christ centered addiction recovery program.
Rogue Valley Medical Center, a member of Asante Health System
RVMC in Medford Oregon is a member of the Asante Health System, a locally owned and governed, not-for-profit organization. Asante also includes Three Rivers Community Hospital in Grants Pass.
Fundraising auction for blindness, Charity Sight Savers International Organization. Bid for BMW Mini Cooper, Sony Vaio, World Cup tickets.
Offers video tape duplication and video tape transfer to all formats. Camcorder, TV, DVD, and VCR repair. Sony authorized repair center. Pennsylvania based.
В статье использованы материалы:
http://www.sony.ru/electronics/support/articles/S700024830
http://www.sony.co.uk/electronics/support/articles/00070113
http://mdex-nn.ru/page/error333-sony-vaio-recovery.html
http://netler.ru/ikt/sony-vaio-rescue-windows.htm
http://www.pcrpr.com/tag/vaio-recovery-center-error
http://withsteps.com/1303/how-to-use-sony-vaio-recovery-tools.html
http://botcrawl.com/sony-vaio-recovery-center/
http://www.yodot.com/hard-drive-recovery/sony-vaio-recovery.html
http://www.downloadcollection.com/software/vaio-recovery-center-software-download.htm
Оставить комментарий